KMBOX Bpro / MAKCU serial setup
Before using the SkyAim Pro aimbot with a KMBOX B Pro, make sure the device is connected correctly. It talks to SkyAim Pro over a USB serial port: wire it, install the serial driver on the radar PC, note the COM number and select it in the Aimbot section. A MAKCU running km.* serial firmware follows the same steps.
1. Preparation and connection#
Connect one cable from the top-left KMBOX slot (marked COM on the screen edge) to the radar PC, then another cable from the bottom-left slot (PC) to the game PC. Mouse and keyboard go into the right-hand ports.
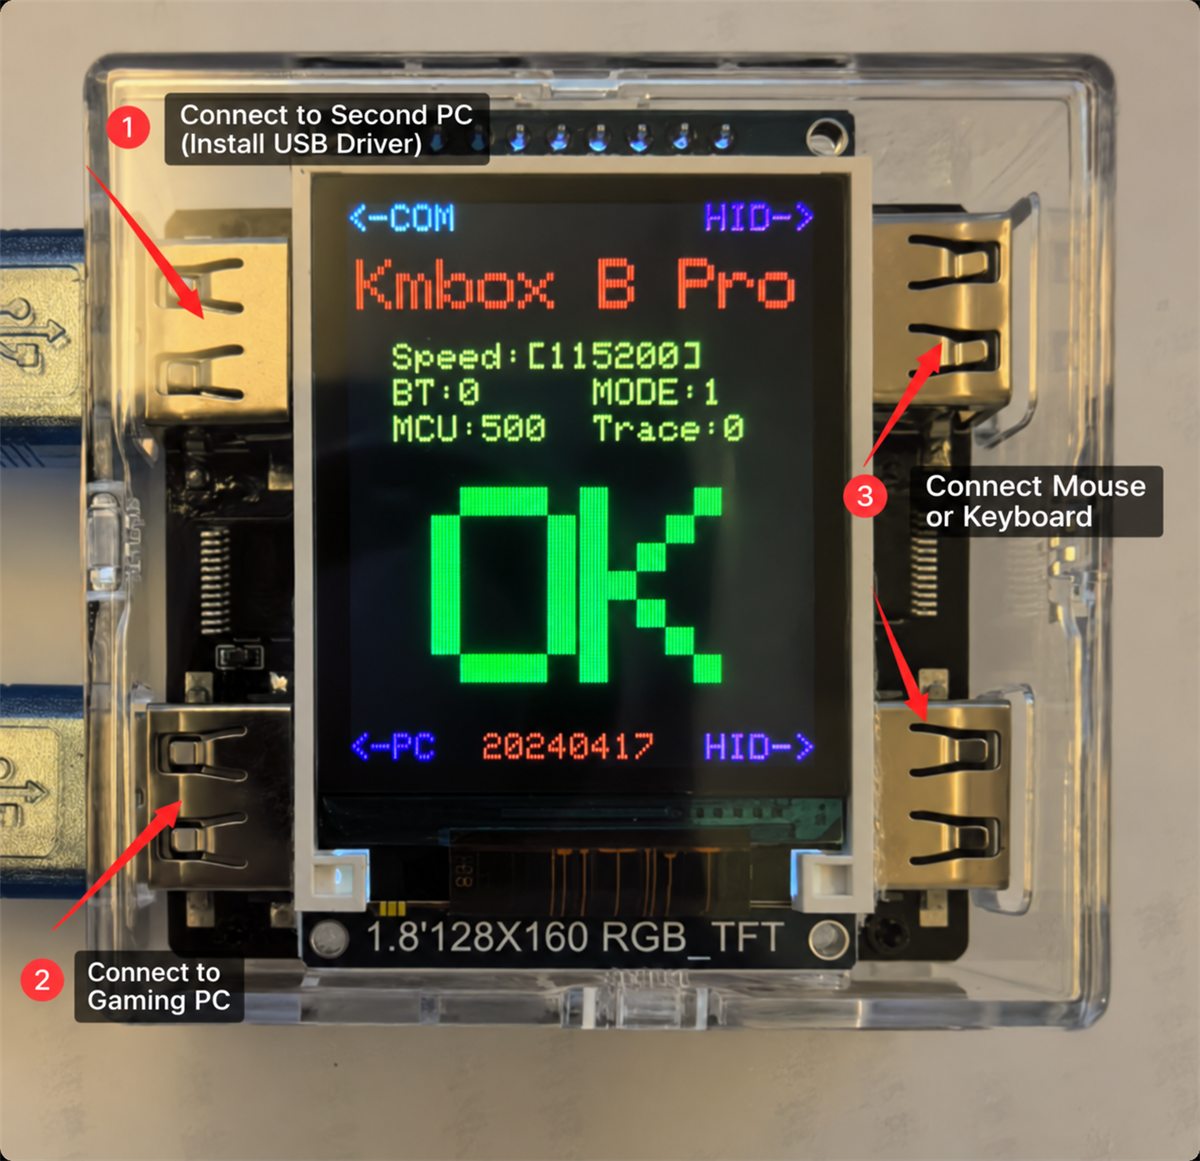
If the COM cable goes to the game PC, the radar PC never sees a serial device and the game PC sees an unknown USB device. Both left ports look the same; follow the labels on the screen edge.
If the serial driver is not installed yet, install it on the radar PC first (CH340 / CH341 for the B Pro, CH343 for a MAKCU) and restart the radar PC when the installation completes.
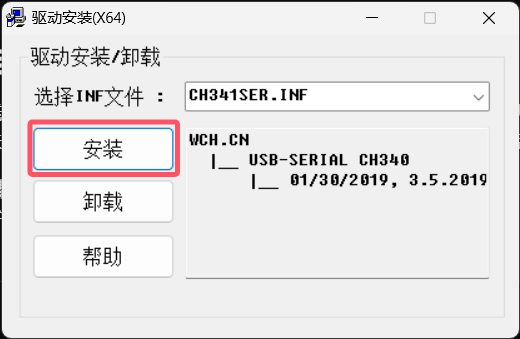
2. Bpro / MAKCU serial setup#
- Open Device Manager
Press Win, search for and open Device Manager, then expand Ports (COM & LPT).
- Note the COM number
Look for USB-SERIAL CH340 (B Pro) or USB-Enhanced-SERIAL CH343 (MAKCU) and remember the number in brackets, for example COM7.
- Select the port in SkyAim Pro
Aimbot section (Ctrl 6) → Device → choose the matching COM number → Connect. The Firmware line shows the device's
km.*signature.

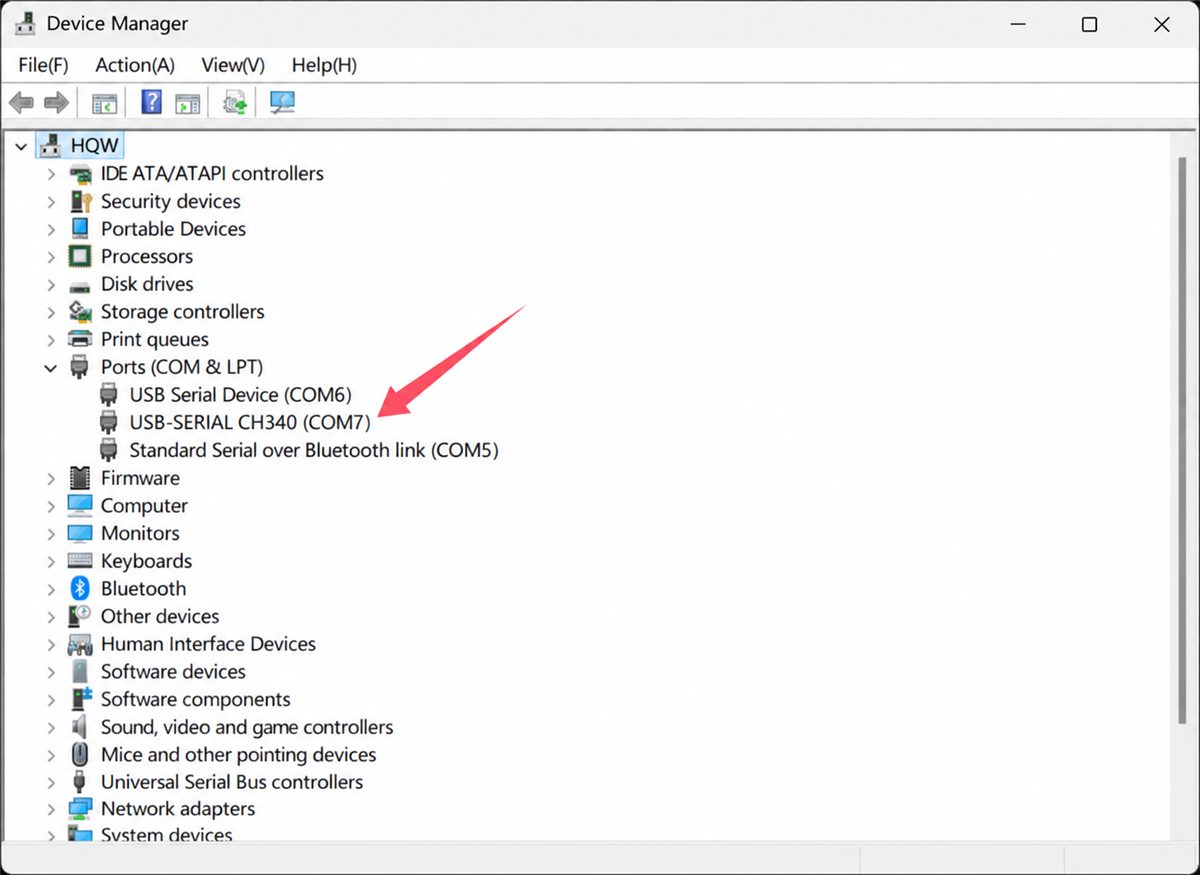
Unplug the device, watch which entry disappears from Device Manager, plug it back in. That entry is yours.
Troubleshooting#
If nothing happens after you click Connect, or you see an error, the cause is usually the device wiring, its driver or its firmware rather than SkyAim Pro.
| Message | Cause | Fix |
|---|---|---|
| Failed to open Makcu serial port | Another program holds the COM port. | Close other device tools (vendor test apps, terminal programs) and connect again. |
| Device did not return expected signature | Wrong port (a different USB-serial adapter) or firmware without the km.* signature. | Pick the right COM number; flash the firmware the vendor recommends. |
| Connected, but Mouse test moves nothing | The game-PC cable is in the wrong port or not plugged in. | Move the cable to the bottom-left (PC) port. |
Verify and calibrate in SkyAim Pro#
- Mouse test
In the Aimbot section click Mouse test. The cursor on the game PC draws a small square. Nothing else works until this does.
- Connect on startup
Tick it so the device is opened every time SkyAim Pro starts.
- Calibration (this PC)
Run it once after the first successful Mouse test, and again after you change mouse DPI or in-game sensitivity (unless Use the game's sensitivity settings is on). It is stored per PC, not per profile. Until you do, the status reads Not calibrated: using the default gains.
- Aim button
The device reports its own button presses, so the Aim button (Mouse 4 or Mouse 5 are the usual) is detected even though the mouse is physically on the game PC. Keyboard hotkeys (Toggle aimbot, Engage aimbot) are optional extras.
Now tune the aim itself: Device aimbot reference.
Check the FAQ and the launcher message list first. If that does not solve it, send the publisher your newest file from output\Logs (or launcher-update.log for launcher problems).